Talks ∋ Names from a hat
Names from a hat

Hi, I’m Murray, thanks for coming to my talk.
London Ruby User Group (LRUG)

As my intro mentioned, one of the things I do is co-organise the London Ruby User Group. LRUG for short — if you really stress the L you can pronounce it as El Rug and sigh hence the logo.
We meet monthly, on the second Monday of the month, every month. If you’re coming to London you should arrange your holiday to coincide with one of our meetings so you can come chat to us about ruby and learn that the ocean that divides us can be easily bridged by a love of open classes, blocks, and duck typing.
Randomising names

A thing I have to do as part of organising that meetup is randomise names of people. Very often I have needed to choose winners of a raffle or giveaway. Once we ran a battleships tournament as a practical exercise and I had to pair up the participants to create the playoffs. For a particularly packed meeting, rather than carefully curating a perfect agenda like Sarah & Jenny1 have done for the “Weird Ruby” track at this conference, I’ll just randomise the order of the talks.
It happens more than you might think so I like to have a system.
Now, the obvious way to do this is to write everyone’s name on a bit of paper, put the bits of paper in a hat, and draw the names one by one to select a winner or generate an order.
And that’s fine…
But it’s not very ruby-y and this is RubyConf, not PaperAndHatsConf, so how can we do this with ruby?
Ruby is the perfect tool
Well, I am delighted to tell you that ruby is the perfect tool for the job:
-
Array#shufflewill return your array in a new, randomised order (perfect for tournaments and running orders!) -
Array#samplewill pick a random element from the array (perfect for prize winners)
Everything we need is right there — they talk about python as being “batteries included”, but I think Ruby is really doing great here.
Randomising names with ruby - part 1

Randomising names with ruby - part 2 - putting names in the hat

We just put the list of names into our hat (an Array) …
Randomising names with ruby - part 3 - picking names

… and then pick the names from it (call shuffle or sample depending on our need) …
Randomising names with ruby - part 4 - announcing the result

and then announce that result (call puts with it).
Randomising names with ruby - part 5

If we run the snippet we’ll get a running order for the “Weird Ruby” track in an instant and can go catch up on some prestige TV with the time we’ve saved.
And the code is so elegant. It’s beautiful!2
Names from a hat…

So, that was “names from a hat” - we got right into it and we found out ruby does exactly what we want.
Buuut… I’ve got 28 more minutes to fill…
…or over-engineering for fun, not profit

…thankfully, an alternative title for this talk is “Over-engineering for fun not profit”.
Now, I’m an Engineering Manager for a company called Cleo. We’re a fintech building an AI assistant that turns the complexity of personal finances into a conversation – the same kind youʼd have with a friend – and supports people throughout their financial lives.3
At work what’s important is shipping the smallest possible thing that lets us deliver value to users or the business (ideally both). We do this by building on top of:
- existing features
- gems
- 3rd party service providers
- and so on
This lets us move quickly to build the simplest thing that will meet the requirements, and we’re not afraid to shrink the requirements to help us get something out sooner so we can learn. Why build an all-singing, all-dancing feature in the product, when a landing page test might let us learn as much, and sooner? What I’m saying is:
Over-engineering is bad… at work.
But, this is “Weird Ruby” not “Best Practices Thought-Leader Ruby”, so let’s quiet that “EM at a startup” voice down a bit. I’m here to sing the praises of over-engineering for fun. We’re going to do that by exploring some of the ways I’ve personally over-engineered calling Array#sample or Array#shuffle while wearing my LRUG organiser hat. Along the way, because we should embrace all facets of ourselves, that “EM at a startup” voice might pop up with some thoughts on why the occasional bit of recreational over-engineering is good … actually?
Over-engineering #1 - learning

Why might you want to over-engineer something?
The first reason we’re going to look at is that I wanted to learn about a new feature of ruby.
As part of a lightning talks evening at LRUG I decided to talk about the, at the time new, feature in ruby called fibers. I didn’t know anything about them so I had to go and research how they worked, and what they even were so that I could give the talk about them.
I learn a lot by researching and reading about a topic, but I learn even more if I hold the technology in my hands and try to make something with it.
I had:
- a problem I knew how to solve - randomising a list of speakers
- a technology I wanted to explore - ruby fibers
This is the best combination for learning I reckon. This was the “final thought” of my talk, “Re-interpreting data” last year so I won’t belabour the point. I’ll just suggest you find that talk and bask in 45 minutes of …
Aside: Pursuing Pointlessness

Aside: actually, don’t watch my talk from last year, instead, go to this URL and watch “Pursuing Pointlessness” by Chris Howlett from this year’s Brighton Ruby conference. It’s a 5 minute lightning talk that covers the same themes of exploring fun things as my talk, but it takes like 10% of the runtime. It’s so good I’m not even mad about it.4
Concurrency Control Flow - part 1 - intro

Anyway, back to fibers. I’m not here to explain fibers, at least not in detail, but the extremely high-level version is they are a concurrency model that allows for explicit control flow between different running parts of your code5.
Concurrency control flow - part 2 - single threaded
This line represents all the code in your ruby program.
And this ruby represents CPU time in the program.
In a single threaded program your CPU is doing one thing at a time and it just runs through the program until it gets to the end.
Concurrency control flow - part 3 - multi-threaded
With multiple threads we get the illusion of multiple things happening at once, as represented by two lines of “code”, but it achieves this by giving each thread a tiny bit of CPU time before moving on.
Interrupts tell each thread “stop, it’s someone else’s turn now”. You’re not in control of when that happens so you have to code really defensively around it to avoid deadlocks and access to shared objects.
Concurrency control flow - part 3 - fibers
In fibers there’s still really only one thing running at any one time, but you are in control as you explicitly tell the CPU when to run code in one fiber and when it should stop.
That’s what these Fiber.yield and Fiber#resume calls are doing - passing control back and forth between two fibers programatically6.
Randomising names with Fibers - part 1

Anyway - this is how I over-engineered the problem of randomising speakers using fibers:
Randomising names with Fibers - part 2 - yield & resume

We can see the Fiber.yield and Fiber#resume calls here. I’ve got multiples of both so I’m passing control around a fair bit.
Randomising names with Fibers - part 3 - passing shared data

Here we give the random_choice fiber a list of names for it to work with and entirely avoid issues of shared memory access because we’re in control of when CPU time is passed around.
Randomising names with Fibers - part 4 - manipulating shared data

Safe between Fiber.yield calls in the loop the fiber can do whatever it wants to that array safe in the knowledge that those manipulations won’t get interrupted by something else. What it does is randomly pick a name and delete it from the list, before passing that name out in the Fiber.yield call.
Randomising names with Fibers - part 5 - keywords to use later

The “keywords you can google later” for this are “co-routines” and “co-operative multitasking”, or … go to the session Jamis & Adviti are running later called “Flattening Recursion with Fibers” (video & code slides)7.
Randomising names with Fibers - part 6 - a frisson of danger
Now. Obviously you don’t need fibers to do this. This is over-engineering for sure. I mean, I’m even using the wrong Array method — shuffle is the one that I should use for a running order from an array, but I’m using sample to get individual elements!!
Not gonna lie though I enjoyed the frisson of danger that comes from writing an infinite loop. You don’t get to do that often in production code do you?
That’s one, I think, of the fun things about fibers, you can, kinda, almost, throw away your ideas about termination and loops.
Over-engineering is good actually #1 - familiarity for future use

Anyway, I wouldn’t say I’ve used fibers in production. I know that deep in the stack of my rails app there are fibers being used somewhere, but I didn’t write that code. Having explored fibers a bit though, I do have some residual knowledge lurking there in my memory, ready to leap out and be useful at some point. For example if I have to spelunk deep into the libraries we use and encounter fiber code, or if I have to debate the merits of the puma app server (which is thread-based) vs the falcon app server (which is fibre-based).
So, my plea to you, go explore some technology you’re not using and have no real need to use … yet. Use it to solve some problem it’s wildly inappropriate for, you’ll get exposure to it and be that bit more familiar when you encounter a problem it is appropriate for. You don’t want shipping to production a new mission critical change to your app to be the first time you’ve ever used that new tech.
Over-engineering #2: building UI

The next way I over-engineered randomising speakers was to build a UI on top of the process. I wanted a more visual element to the problem because we would randomise the speakers on the night so I wanted there to be something more interesting to view than some strings in the terminal. And, I wanted to do it end-to-end in ruby.
At the time, the tool for doing that was to use Shoes. If you’ve not heard of it, Shoes is one of _why the lucky stiff’s projects. It’s a version of ruby that can be used to build desktop applications. The UI elements are very similar to what you get with HTML, and positioning and styling is similar to CSS - so it’s very familiar if you’re doing web stuff for the day job.
Randomising names with UI - part 1
Warning: this video does have some rapid flickering in it, so maybe don’t click play if that would bother you
So this is what I came up with:
This app shows a list of potential speaker names. When you press the button it cycles through the names to highlight the one that might be chosen. When you press the button again, it picks one and shows it big. Then you repeat this process until all the names have been chosen, and your final button press shows a list of all the names in the order you chose them. Quite the step up from strings in the terminal. Success!
Now, obviously, you could do this kind of UI in the web. The difference is that we have to think in two languages to do it, ruby for the backend on the server, and javascript on the client. With shoes, it’s all ruby. That’s what’s fun about this version for me.
The whole app code isn’t huge, but more than I can squeeze on a single slide so I’ll show you some of the interesting parts.
Randomising names with UI - part 2 - a shoes app

This is the bare bones of the app. Like fibers I’m not here to go into lots of detail on how Shoes works, but you can probably see that it’s a DSL for writing GUIs. Lots of do … end blocks and new UI phrases.
Randomising names with UI - part 3 - Shoes.app

You start everything with a Shoes.app method, and this:
- unlocks the Shoes DSL for use in the block
- renders a shoes UI window onto your desktop
Randomising names with UI - part 4 - initialising

There’s no initialize method so if you need some internal state, you just set that up in the block. Here I’m using ask_open_file to prompt the user for a file to read the list of names from, and then I’m setting some instance variables for use later.
Randomising names with UI - part 5 - background colour

Next we have the background method to set the background colour of the window – all the fun named colours from HTML are defined so you don’t need to break out RGB triples if you don’t want to.
Randomising names with UI - part 6 - element containers

Now we get into something Shoes-y. stack defines a UI element container that stacks elements you put into it vertically, in contrast to the other major building block a flow which flows elements you add to it horizontally. Yes, these are like block level and inline level elements in HTML. They’re simple, but give you lots of flexibility.
The methods in the stack there are some of my “other implementation details” that actually render the button and list of names that you saw in the video.
Randomising names with UI - part 7 - the animate block

Finally we have the animate method and block. I’m asking it to run this block of code 24 times per second, just like a film! If our state supports it we’ll pick a winner to display.
Randomising names with UI - part 8 - keywords to use later

These are the basic building blocks. There’s lots more to explore but this is enough for now I think. It’s the ruby you know and love, driving a simple, but powerful UI kit and well worth exploring.
If you want to find out more later, just search for shoesrb - you can’t really search for just “shoes” or even “ruby shoes” as you’re just going to get loads of actual “shoe on your foot” type content.
Interacativity with buttons - part 1

I do want to show you how to add interactivity though so here’s the code for the button.
Interactivity with buttons - part 2 - creating a button

We provide the button text and some styling attributes and a block for the behaviour that will be run when you press it.
This is where I think I’ve gone off the rails … or should I say shoes?
Interactivity with buttons - part 3 - updating state

Anyway, triggering the button should just toggle some state that other code reacts to (highlighted here where I’m setting the randomising flag), but I’ve also mixed in…
Interactivity with buttons - part 4 - updating internal data

…updating some internal data (deleting something from the volunteers array, and recording the luckiest name in the order array)…
Interactivity with buttons - part 5 - updating the UI

…and some UI code (showing the winner, hiding the winner, drawing the final order).
Interactivity with buttons - part 6 - who is the luckiest?

What’s most frustrating is that this the_luckiest variable… where’s that come from?
Interactivity with buttons - part 7 - elsewhere

Source for code in slide: draw_the_button, animate, pick_a_winner
Well, it’s part of the pick_a_winner method called in the animate loop. In this method we have our old friend Array#sample to pick a name from the list of volunteers and store it in the_luckiest variable, as well as updating the names to style them differently if they are the current chosen name or not.
All the things I want to happen are happening, but it’s not really done in the way you’d want it to for sustainable future development. That’s fine, this is a one off program for a meetup, and I doubt anyone had seen this code until I shared it with you just now.
Over-engineering is good actually #2 - Understanding new paradigms

There’s a lot of code to wrap around that little Array#sample call, so definitely over-engineered. But why I think this was useful is that it exposed me to GUI programming and helped me to understand writing code in a different paradigm.
Mixing state and behaviour is the problem with the code I showed you, and while that’s not unique to UI code, I do think it’s a lot easier a mistake to make with UI code. Getting into it in ruby made it really easy to make those mistakes. I think in part because most of the ruby code I write is fairly sequential. We might dress it up in patterns like ActiveRecord or ActiveJob and even use callbacks or pub-sub, but the fundamental pattern is:
- A web request comes in with some params,
- then we react in the moment to run some action and return a result.
Maybe it kicks off some background processing out of band, but there’s still a fairly straight line. Crucially you don’t need to worry about maintaining and updating state on long-lived objects because the web request or background job finishes quickly.
With GUI programming things are explicitly more event driven, real-time, and long-lived so to avoid getting into a ball of mud you need to think about separating behaviour and state better.
Frontend patterns like MVC (the original UI one, not the web one popularised by rails) or reactive programming (as popularised by react) do this really well, and if you want to understand what your frontend colleagues are doing, it’s useful to have tried your hand at it in ruby. Get into a mess, like I have and you will really understand why you might want to introduce patterns and structure.
Over-engineering #3: animation

The next way I over-engineered the problem was another shoes application, but this time I wanted more … pizazz on the screen8. This time I needed to pick the winners of a bunch of prize draws we were doing for some books so I wanted to drum up some anticipation of the draw which we’d be doing live on the night of the meeting.
In the one we just saw, the flickering names brought an element of tension: “oh it’s highlighted my name, will it be me”, but this time I really wanted to be true to the original ideal - drawing names from a hat.
Randomising names with animation
Warning, this video does have some mild flickering in it, so maybe don’t click play if that would bother you
Here’s a simple scene in which I’ve drawn a classic magic top hat, and at the top we have rendered the name of the book we are giving away as a prize.
When you press the button all the names from our list get animated so they go into the hat. Once they’re all in the hat it starts fizzing with magic energy, and you get a new button with magic words on it. Pressing that releases some magic energy by picking a name and replacing the book name with the winners name. You can continue pressing the button until all the names have been chosen - I wrote it this way because we did this giveaway in person and if the winner wasn’t in the room, we just re-ran until someone was present. I’d carried a load of books there, I didn’t want to carry them home again too.
It’s still a shoes app, but I’ve leaned less into text and buttons and more into art + animation, so there’s some neat things to showcase there about how we do that in shoes.
Drawing a hat - part 1

First here’s the code for drawing the hat.
Mostly these methods are picking a colour, then drawing a simple shape. We then lather-rinse-repeat in order to build up the overall hat image.
Drawing a hat - part 2 - a star

The last call is to a handy star method so you don’t need to draw a bunch of triangles to approximate a star yourself, but there was no hat method for the whole thing. Missing a trick, I reckon.
Drawing a hat - part 3 - positioning

There’s not much to say here other than to point out that, like all your designer colleagues I had to painstakingly handcraft all these left, top, width and height attributes to position and size the hat in a way that looked good and fitted on the screen.
Drawing a hat - part 4 - keywords to use later

If you’ve done any programming with processing or nodebox or HTML canvas or even SVG this might be familiar to you, so you can learn about this style of programming by searching for those things.
It really is quite fun, and I’d encourage you to explore how to create interactive art using these techniques.
Animating a star - part 1

The next bit I want to highlight is the animation. We saw some animation in the last example so you’ll remember we have an animate method that will call the given block each frame.
I’ve learned from the last example, so the animate block here calls a method, instead of having a big inline mess.
Animating a star - part 2 - state-based choices

I mean, the method is still a bit of a mess, but I have hidden some of it so we can just look at how to make the magic star jitter about. If we don’t have a winner, we need to do some magic to pick one; if we do have a winner we need to stop doing magic and show it.
Animating a star - part 3 - doing magic

“Doing magic” is a case of randomly moving the star within a painstakingly crafted bounding box.
Animating a star - part 4 - stopping magic

Source for code in slide: animate, main_loop, do_magic, stop_magic
“Stopping doing magic” is a case of moving it back to the painstakingly crafted mid point.
Animating a star - part 5 - it’s a single frame

Source for code in slide: animate, main_loop, do_magic, stop_magic
What’s interesting here is that for this animation, I only need to think about what needs to happen during a single frame. Shoes’ animate method just repeatedly calls that to creates the animation effect.
Animating putting names in a hat - part 1

The other bit of animation is dropping the names into the hat. It follows similar principles - the animate block calls main loop
Animating putting names in a hat - part 2 - state-based-choices

Again I’ve removed the code for other states.
Animating putting names in a hat - part 3 - picking a name

Relevant to us is that if we don’t have a current name we pick one and draw it on the scene.
Animating putting names in a hat - part 4 - moving the name

If we do have a current name then we move it towards the hat, …
Animating putting names in a hat - part 5 - we need a new name

… and if the result of that is that the name is in the hat, we clear out the current name.
Animating putting names in a hat - part 6 - a single frame

Next frame we’ll ask the same questions and either draw a new name to move into the hat, or move the existing one closer to the hat.
Animating putting names in a hat - part 7 - how we move names

How do we move things into the hat? Well…
Animating putting names in a hat - part 8 - calculate movement

…we work out how much we need to move the name each frame in x, y, and size …
Animating putting names in a hat - part 9 - check movement outcomes

…then we ask if we did move it, would it be in the hole in the top of the hat?
Animating putting names in a hat - part 10 - it is in the hat

If so we put the name in the hat and return true - to say that the name is in the hat.
Animating putting names in a hat - part 11 - it is not in the hat

If not, we resize + move the element and return false to say that the name is not in the hat.
Animating putting names in a hat - part 12 - it’s fiddly, but tweakable, and fun!

Source for code in slide: animate, main_loop, move_steps
The calculations are interesting because we can change that one number to speed up or slow down the animation. Right now it’s set to 24 which means roughly, it should take a second to move each name into the hat based on the frame rate. If I change that to 48 it’ll take two seconds, change it to 12 and it’ll take half a second.
These calculations are sort of annoying and fiddly (ask me later how many times I mixed up x and y vs. top and left9), and you do just need to run it and eyeball it to see if it looks nice or not, which can be frustrating, but it’s a real joy when you do get it right!
Again, I’ve only had to focus on what I need to do for a single frame, and yes it’s more complex than the star jitter, but not really by much. It’s endlessly tweakable and just … fun?
Over-engineering is good actually #3 - Slicing a problem down

The thing to take away from this, other than, honestly, just how much fun working on animation is, is about how to break a problem down. With animation, because the block is called 24 times a second, I don’t need to think too much about how to animate things completely, just about what it should do on each frame. Break the problem down into tiny slices and you can achieve pretty neat results. This is fairly standard programming advice at the macro scale (agile anyone?), so it’s nice to have it apply at the micro scale too. A good practical reminder of simple things adding up to complex results.
Over-engineering #4: games programming
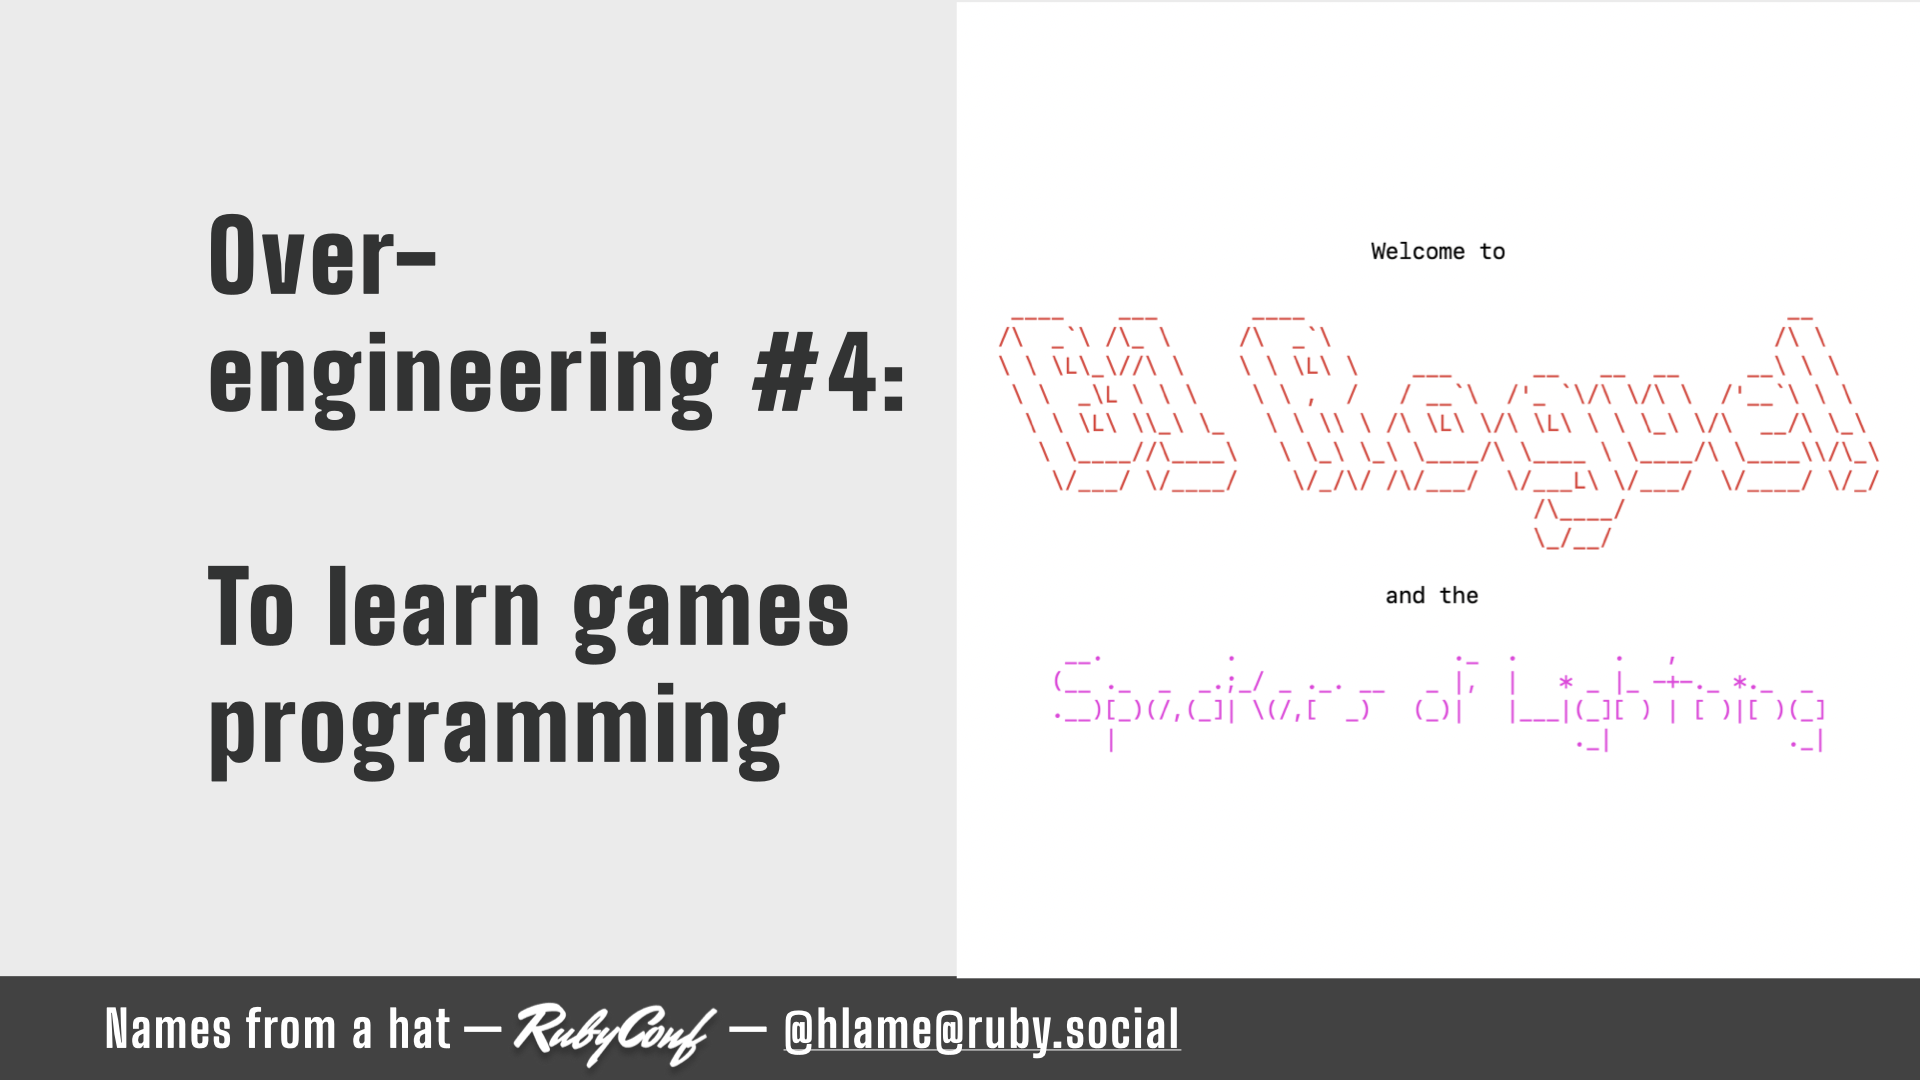
I liked the spectacle of the hat, but I felt that up to now everything was really just a fancy version of the initial Array implementation from the start of the presentation: put a list of names in and call Array#sample or Array#shuffle to get a list of names out.
I really wanted to make something truly interactive and where it felt like I was more a part of the randomisation process. At best, in the previous versions I was controlling a timing element of when to call Array#sample to get a random name out.
The hat with it’s main loop and button-pressing state changes reminded me of what little I knew of game programming. You create a world, you take some input, you update the state of the world, render it, then loop.
So I created a “game” called “El Rogue! And the Speakers of Lightning” - let’s watch it in action while I talk:
El Rogue and the Speakers of Lightning
I didn’t think I could whip up a decent game in shoes, or anything else remotely graphically complex, but I did think I could do something in the terminal. Ruby is great at string manipulation, and with a big enough terminal window, you get plenty of screen real-estate to render a world in.
There’s a terminal game called rogue, where you play as a little @ symbol, traversing a dungeon as delimited by hyphens, pipes, underscores etc to make the walls. You find other characters as monsters to fight or treasure to collect. Randomness comes in in that the whole dungeon is randomly generated each time you play, as is the positioning of the monsters and treasure. Finally, the player themselves wanders the dungeon on their own desire, choosing which monsters to fight, in which order.
This sounded like a perfect combination of computer and human randomisation. I didn’t know how to do it, but it’s just string manipulation and emboldened by my success with conquering animation with the hat version, I figured, how hard can it be?
Over-engineering index - part 1
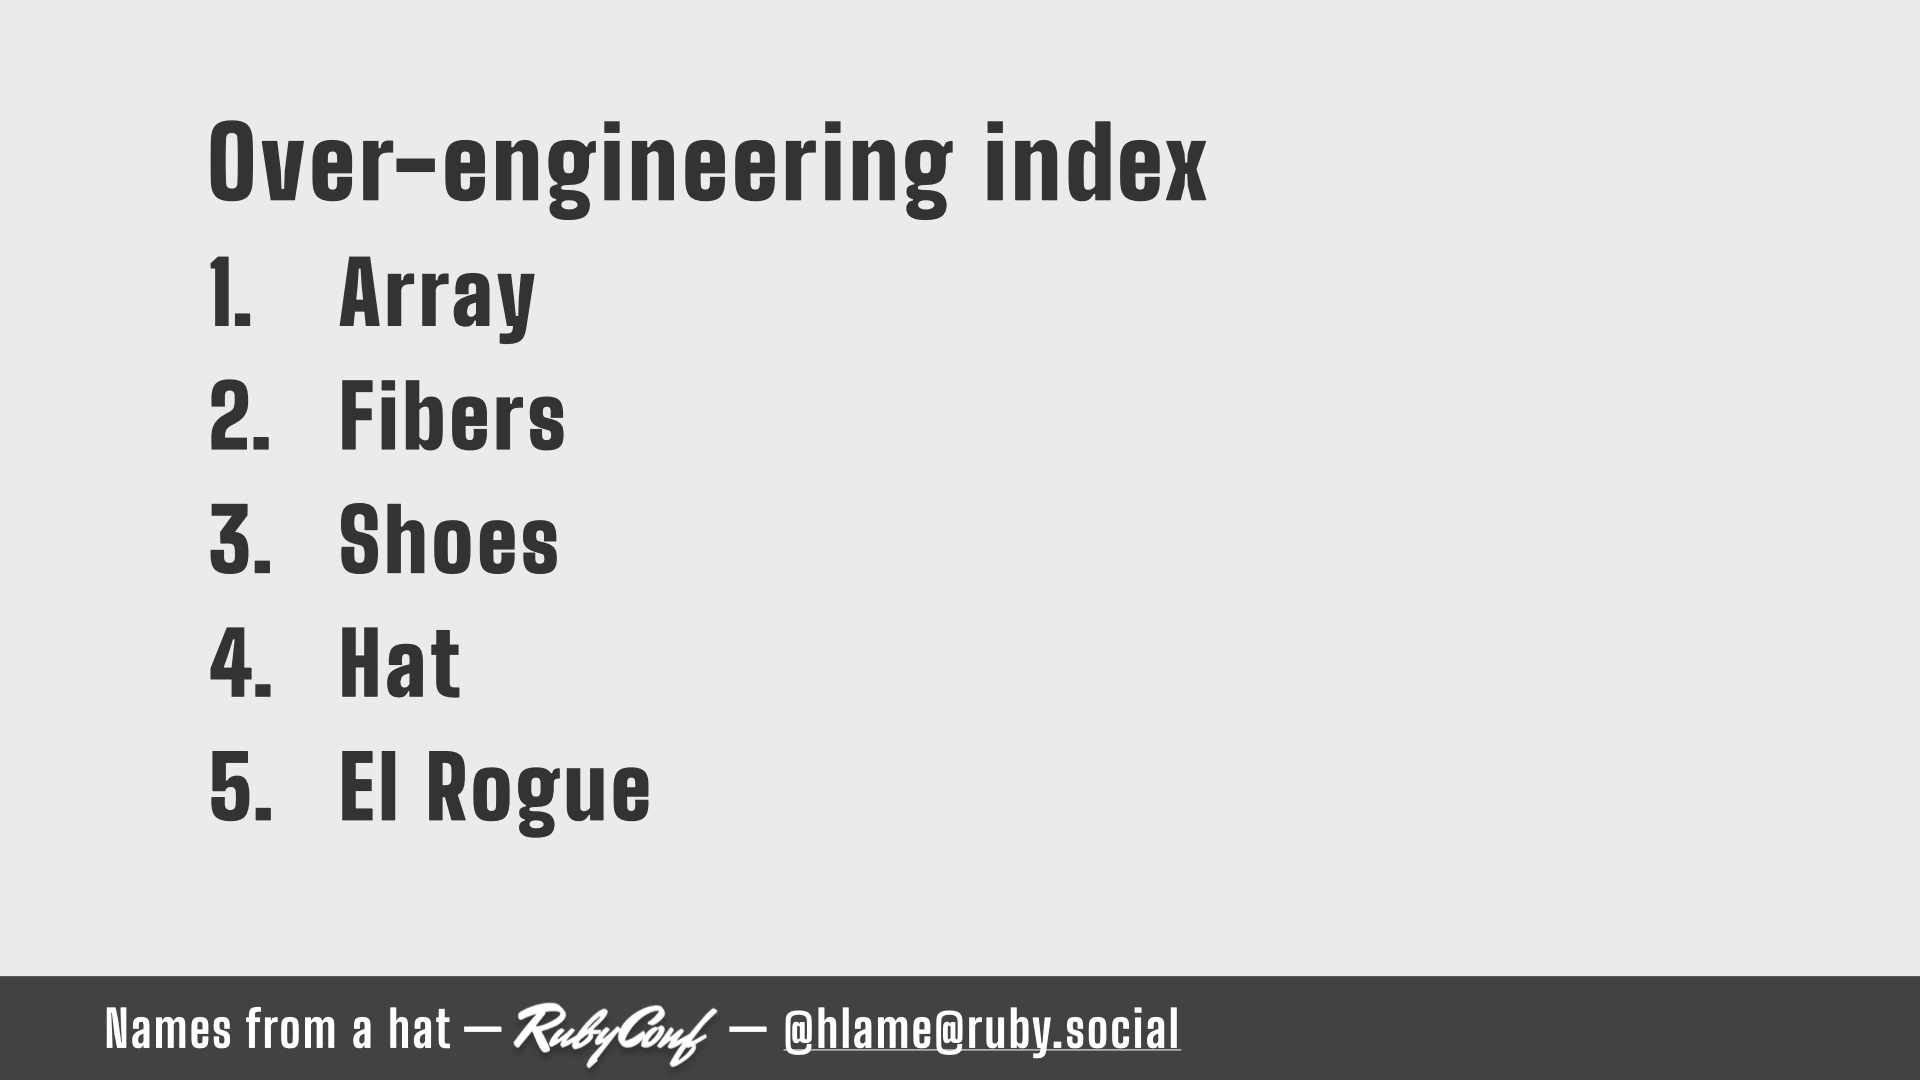
Well, let’s see - we’ll use that perfect measure: lines of code…
Over-engineering index - part 2 - Array
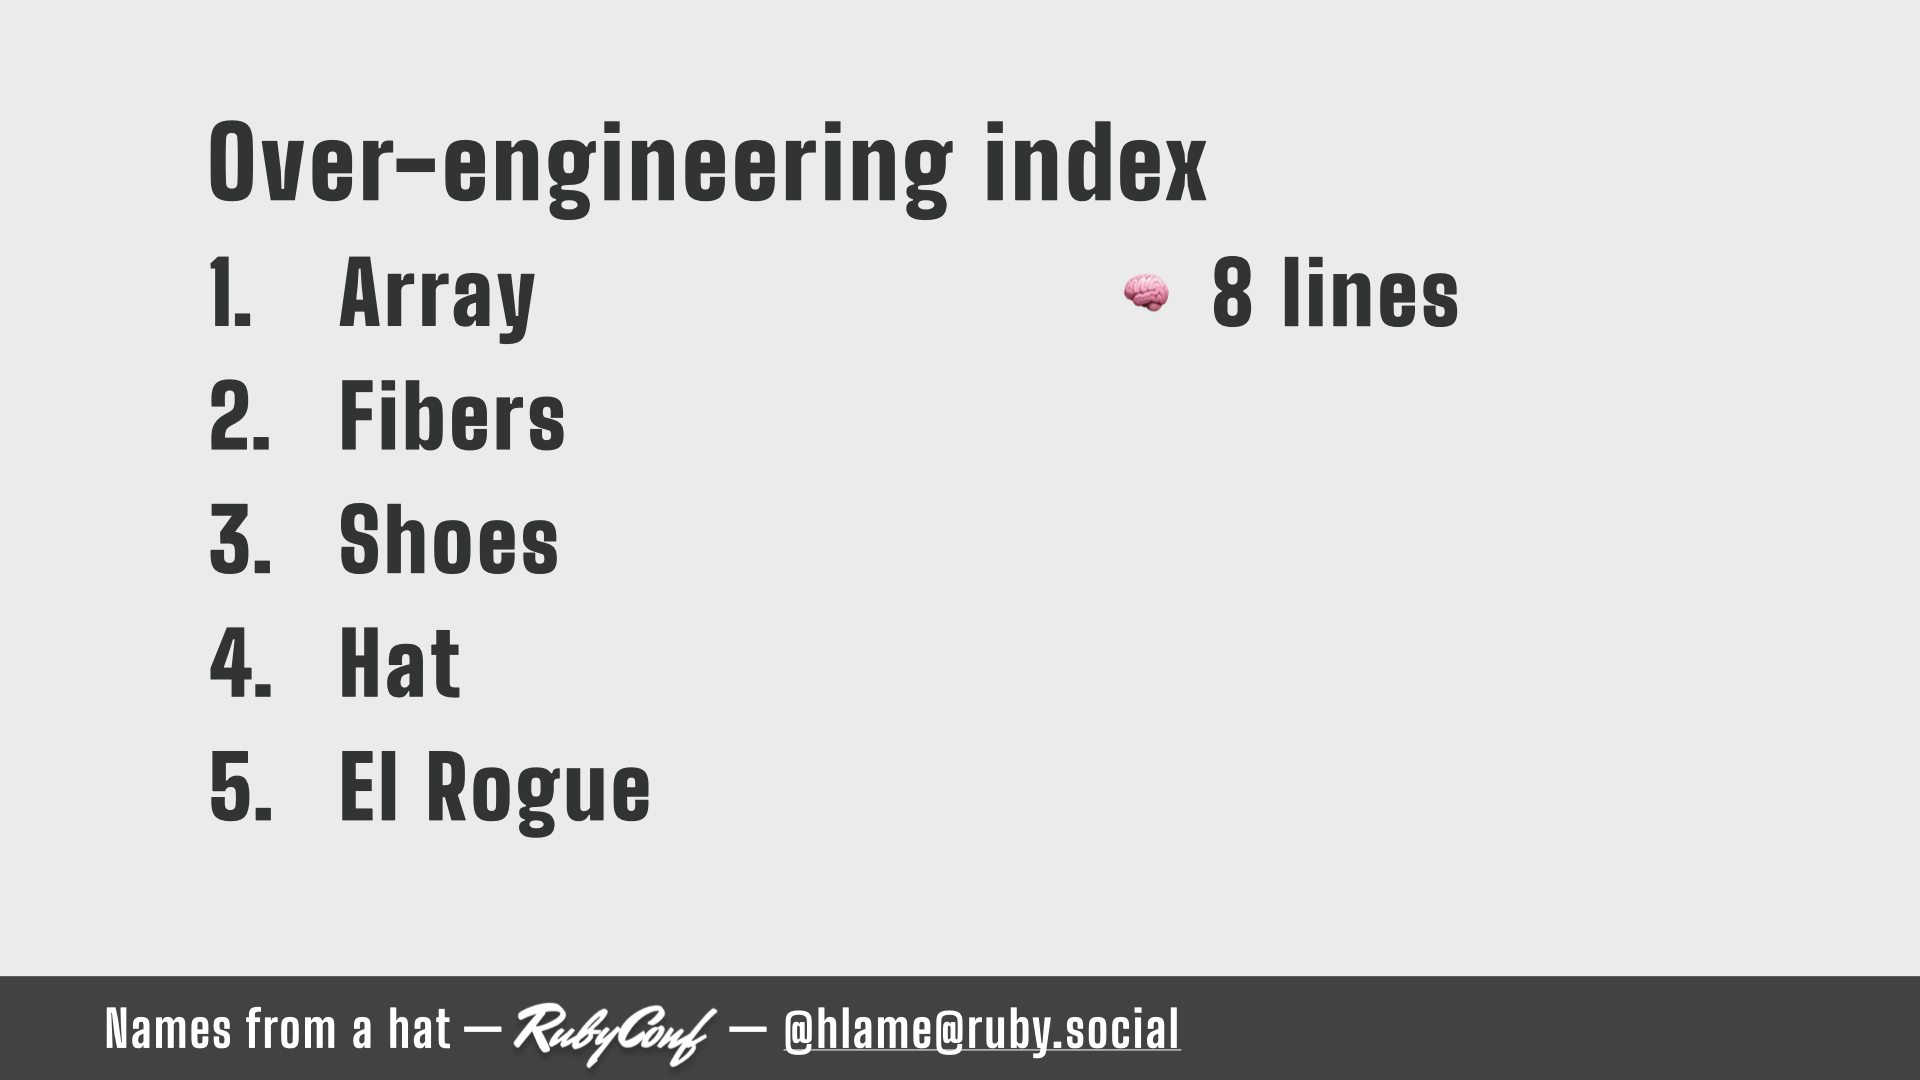
…v1 - an array - 8 lines of code (and that includes the 6 lines of code for the names of the speakers)…
Over-engineering index - part 3 - Fibers

…v2 - fibers - 27 lines of code (which also includes the lines for the names of the speakers)…
Over-engineering index - part 4 - Shoes

…v3 - a simple grid of text with mild animation - 119 lines…
Over-engineering index - part 5 - Hat

…v4 - an animated hat with multiple states of animation - 244 lines…
Over-engineering index - part 6 - El Rogue

…v5 - a fully fledged terminal game - 1,259 lines of code
So, obviously, I can’t show you all this. But there are two things I do want to talk about.
Rendering the world - part 1 - tile sets
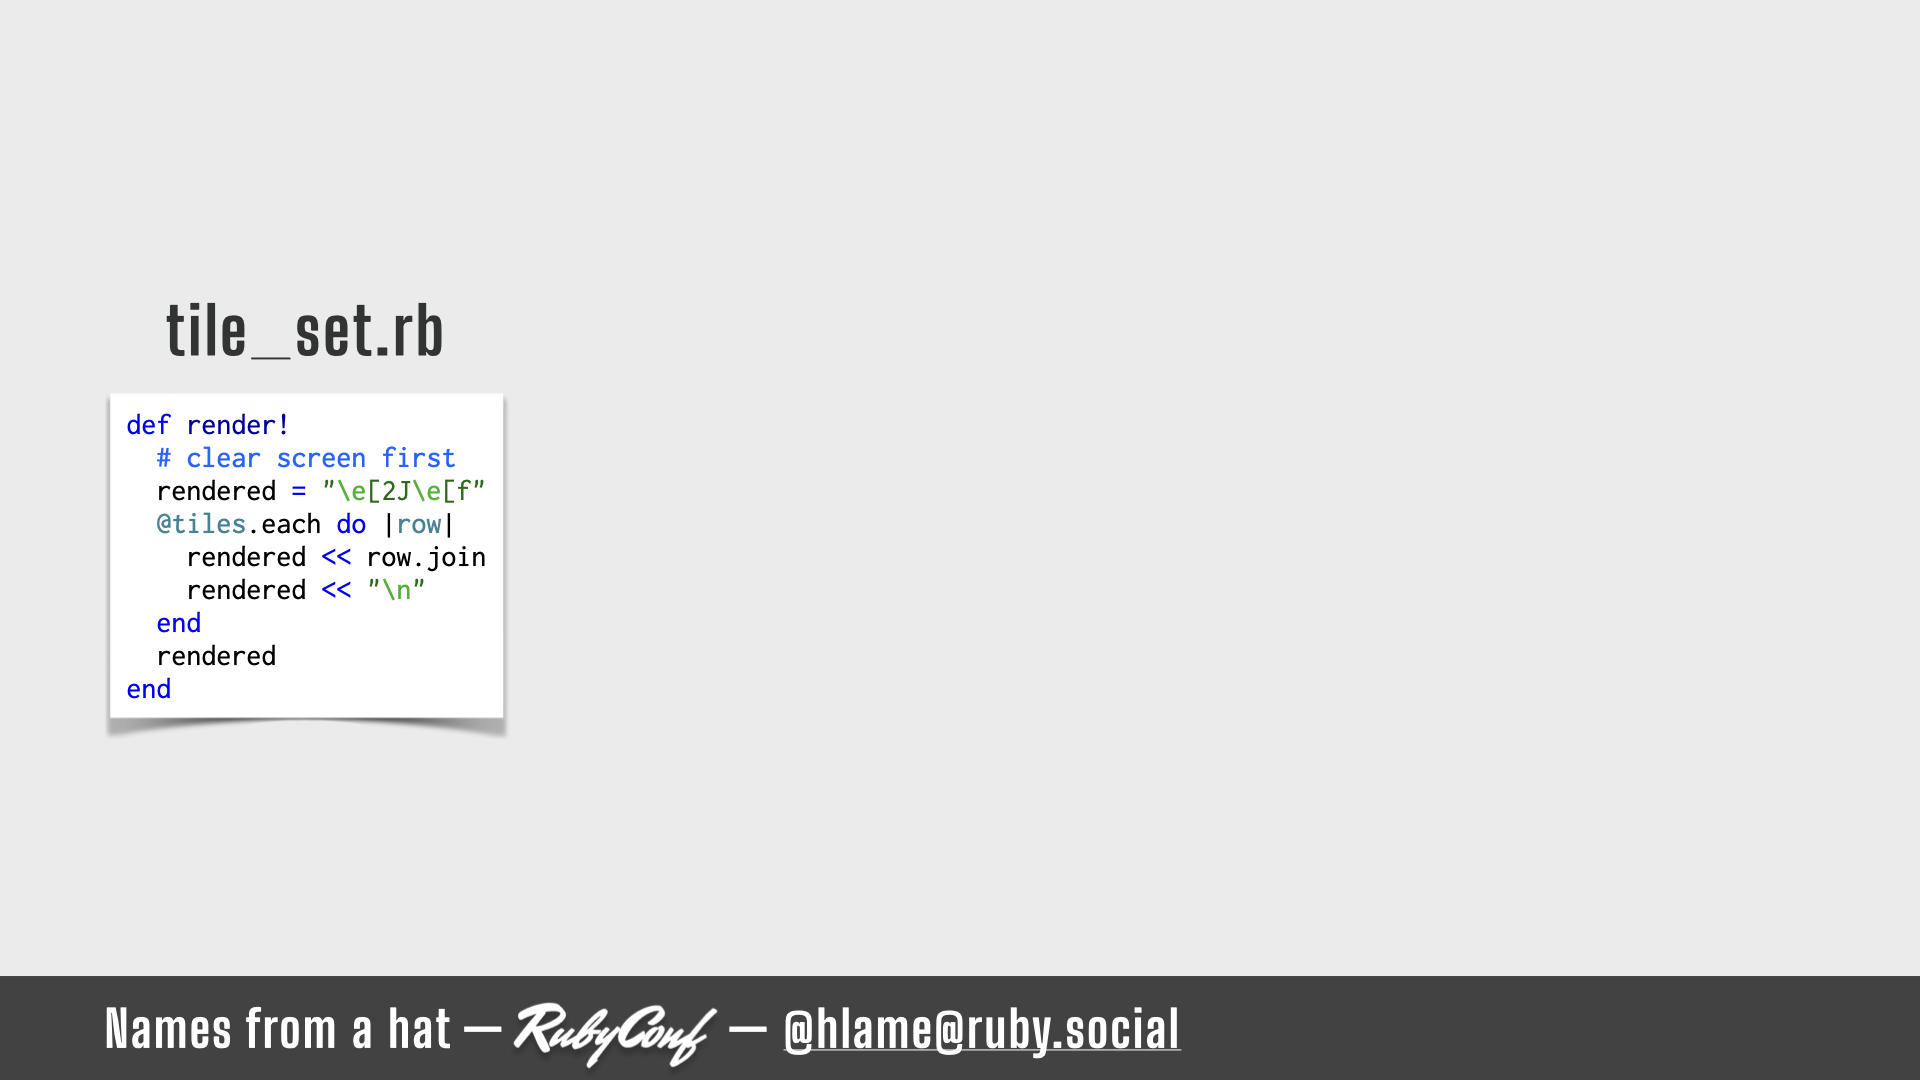
The first thing I want to show is how we render the “graphics” for the game. As I said, it’s a terminal game, so we’re talking puts and Strings, but, don’t worry, I have over-engineered that.
First up, to draw the world I have a TileSet object which has a render! method. This doesn’t cause mutation or potentially raise exceptions, it’s just exciting, so I gave it a bang method name. Sorry rubocop10.
The TileSet contains an x by y grid of Tile objects. Where each Tile represents a single spot in the world, and another part of the system tells these tiles what they contain - floor, wall, corridor. Or occasionally a wizard or El Rogue itself as it wanders the dungeon.
Rendering is just joining each array (e.g. asking each Tile in a row to to_s itself) and then adding a newline between each row.
Simple.
Rendering the world - part 2 - tiles
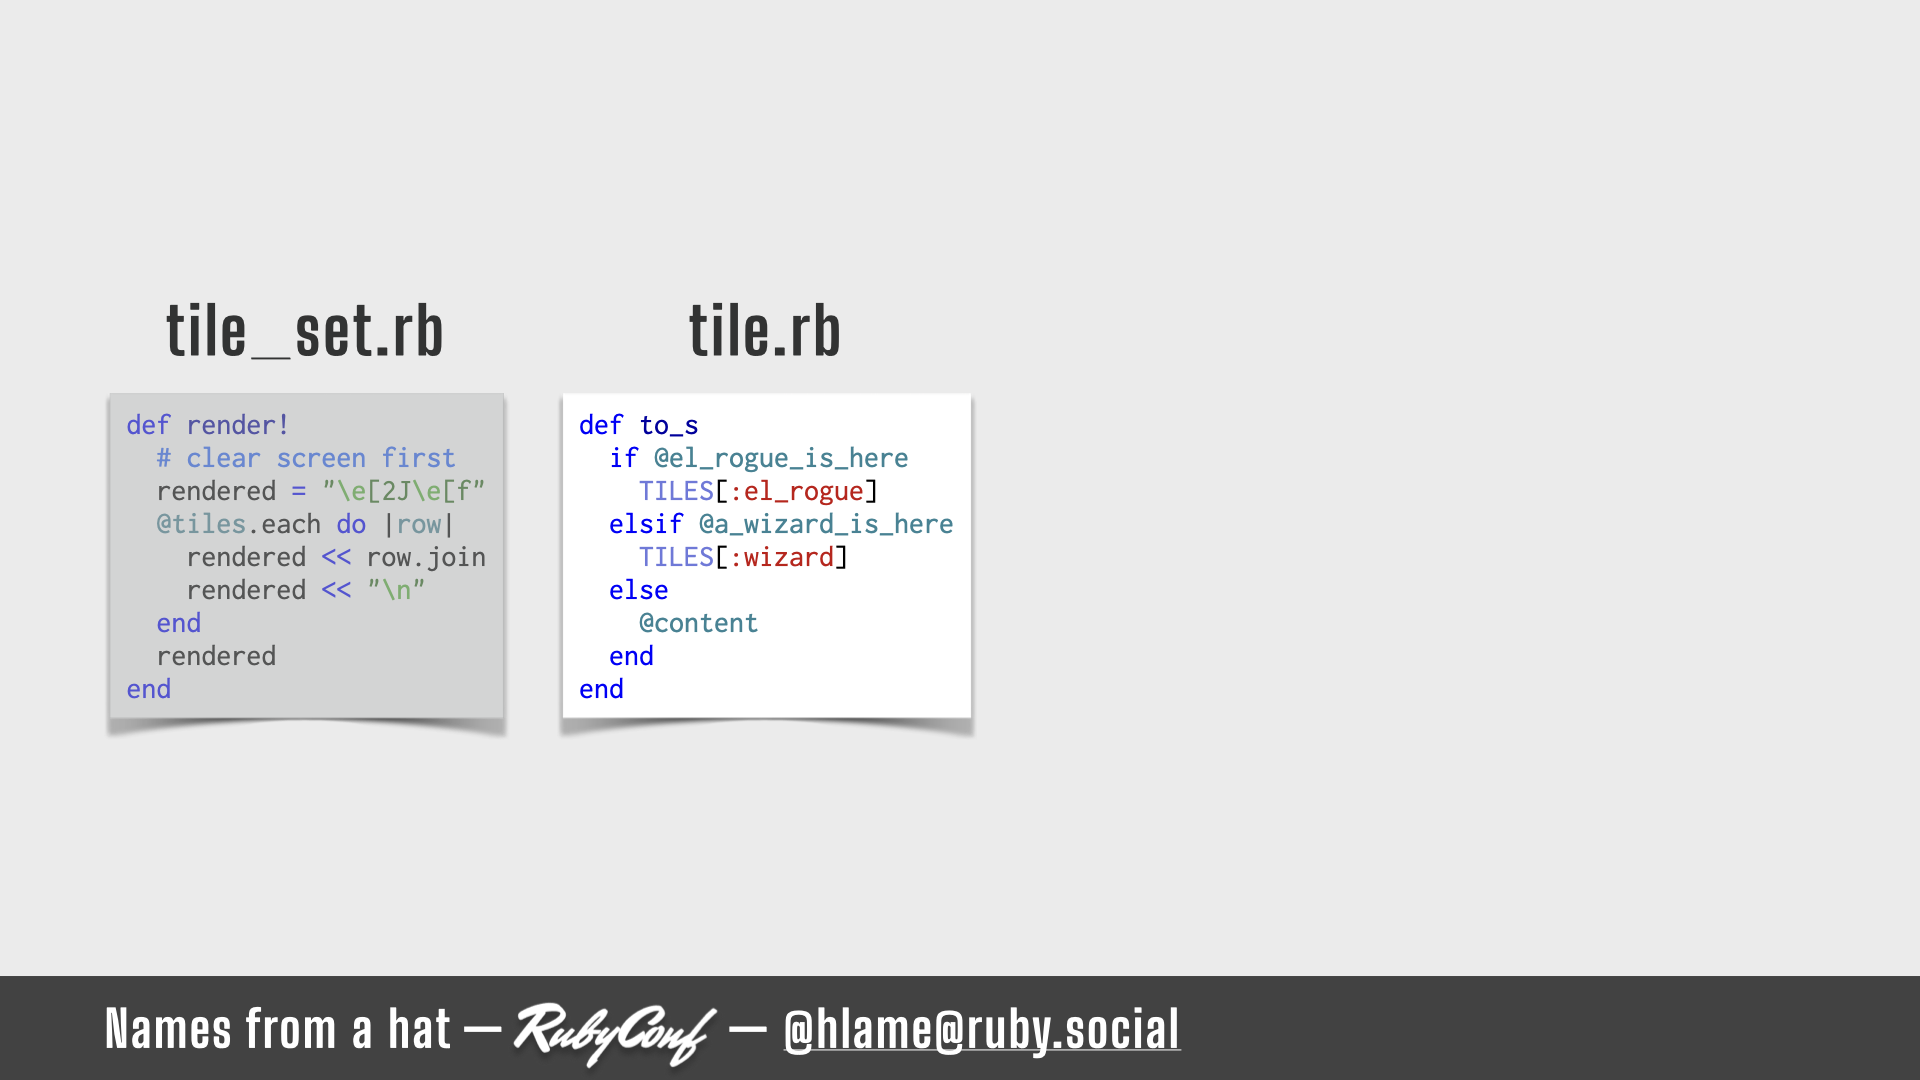
Source for code in slide: TileSet#render!, Tile#to_s
to_s-ing the Tile is also simple.
If El Rogue is here - we render the character for that, if there’s a wizard we render that character, otherwise we render the content. Which is the relevant character for floor, wall, empty space, corridor etc… based on what the Tile was told earlier.
Rendering the world - part 3 - drawing El Rogue
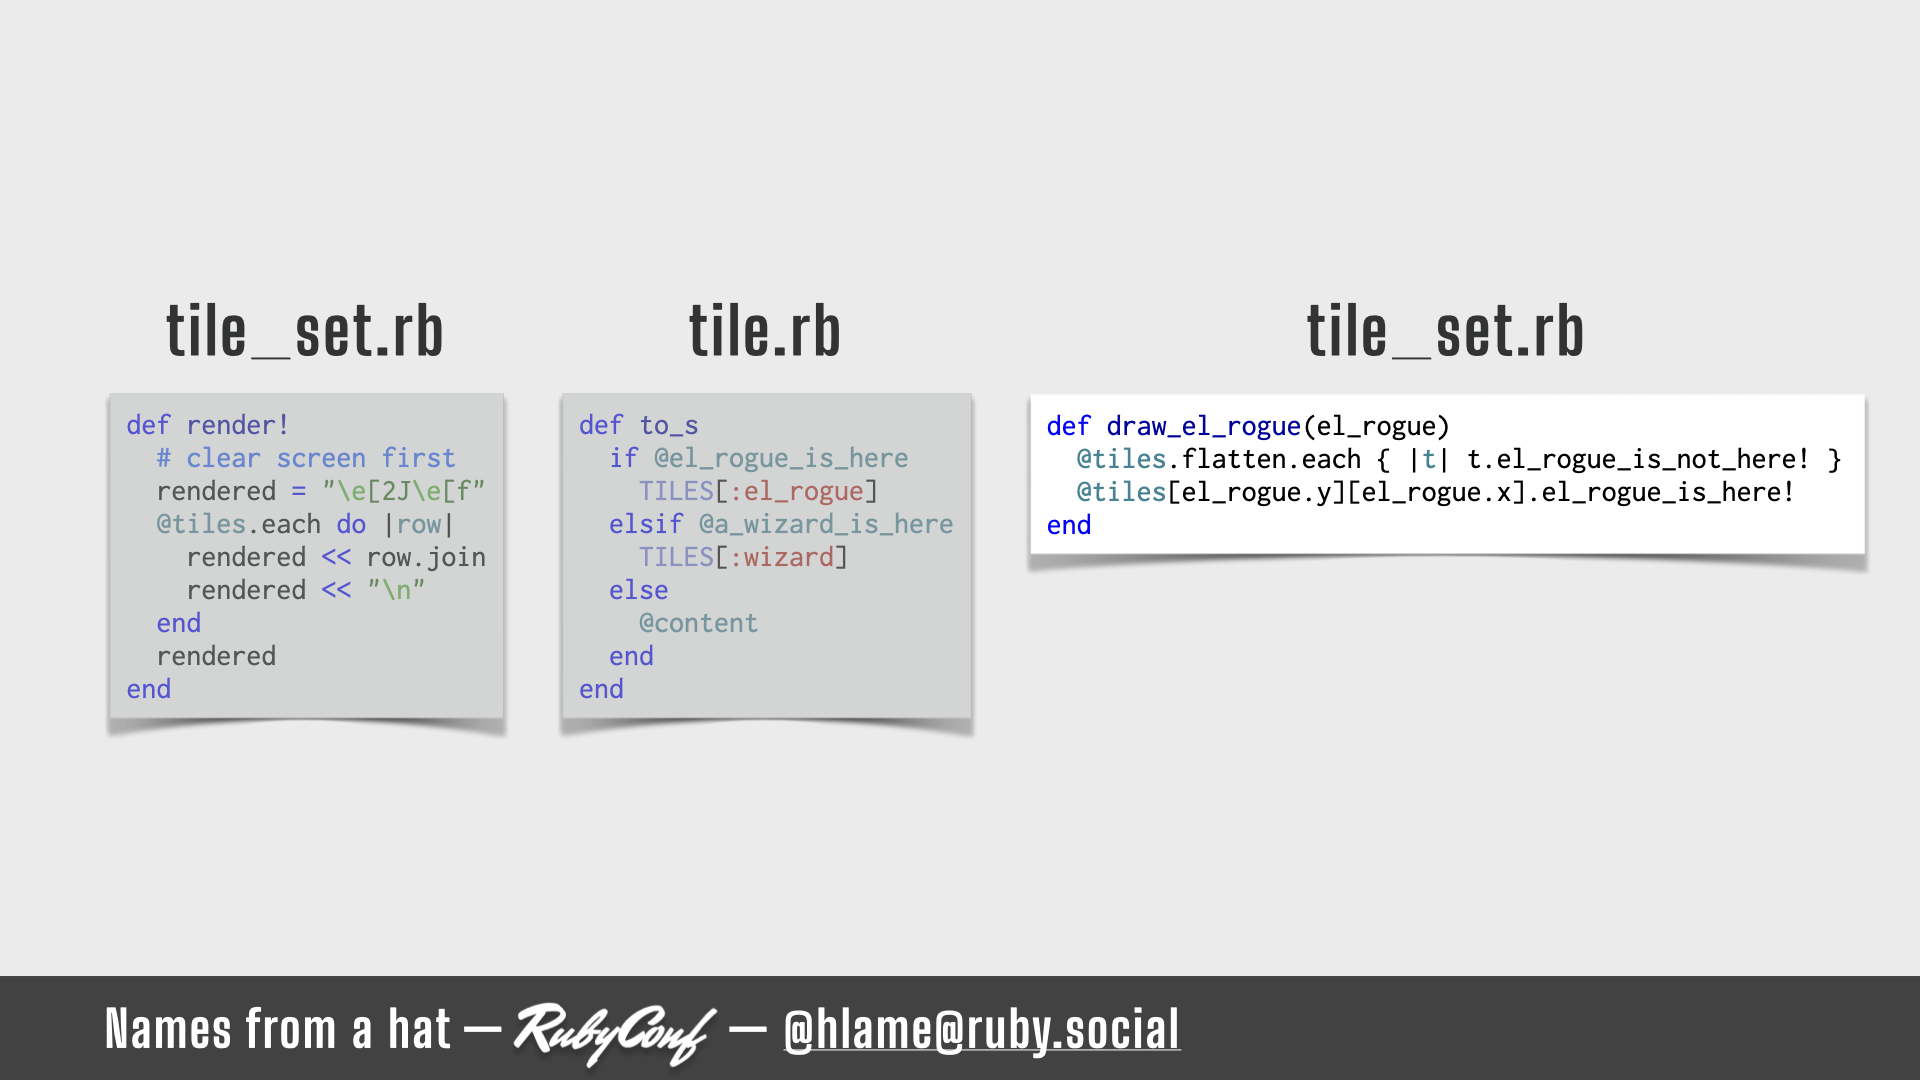
Source for code in slide: TileSet#render!, Tile#to_s, TileSet#draw_el_rogue
El Rogue moves around so we’re constantly having to tell the Tiles where it is. We do that in a method on TileSet that tells all the tiles that El Rogue is not here, then tells the one that represents El Rogue’s current x and y co-ordinates that El Rogue is here.
It’s probably not very efficient, but ruby is fast enough to process all this between keypresses for a terminal game.
Rendering the world - part 4 - so far so simple!
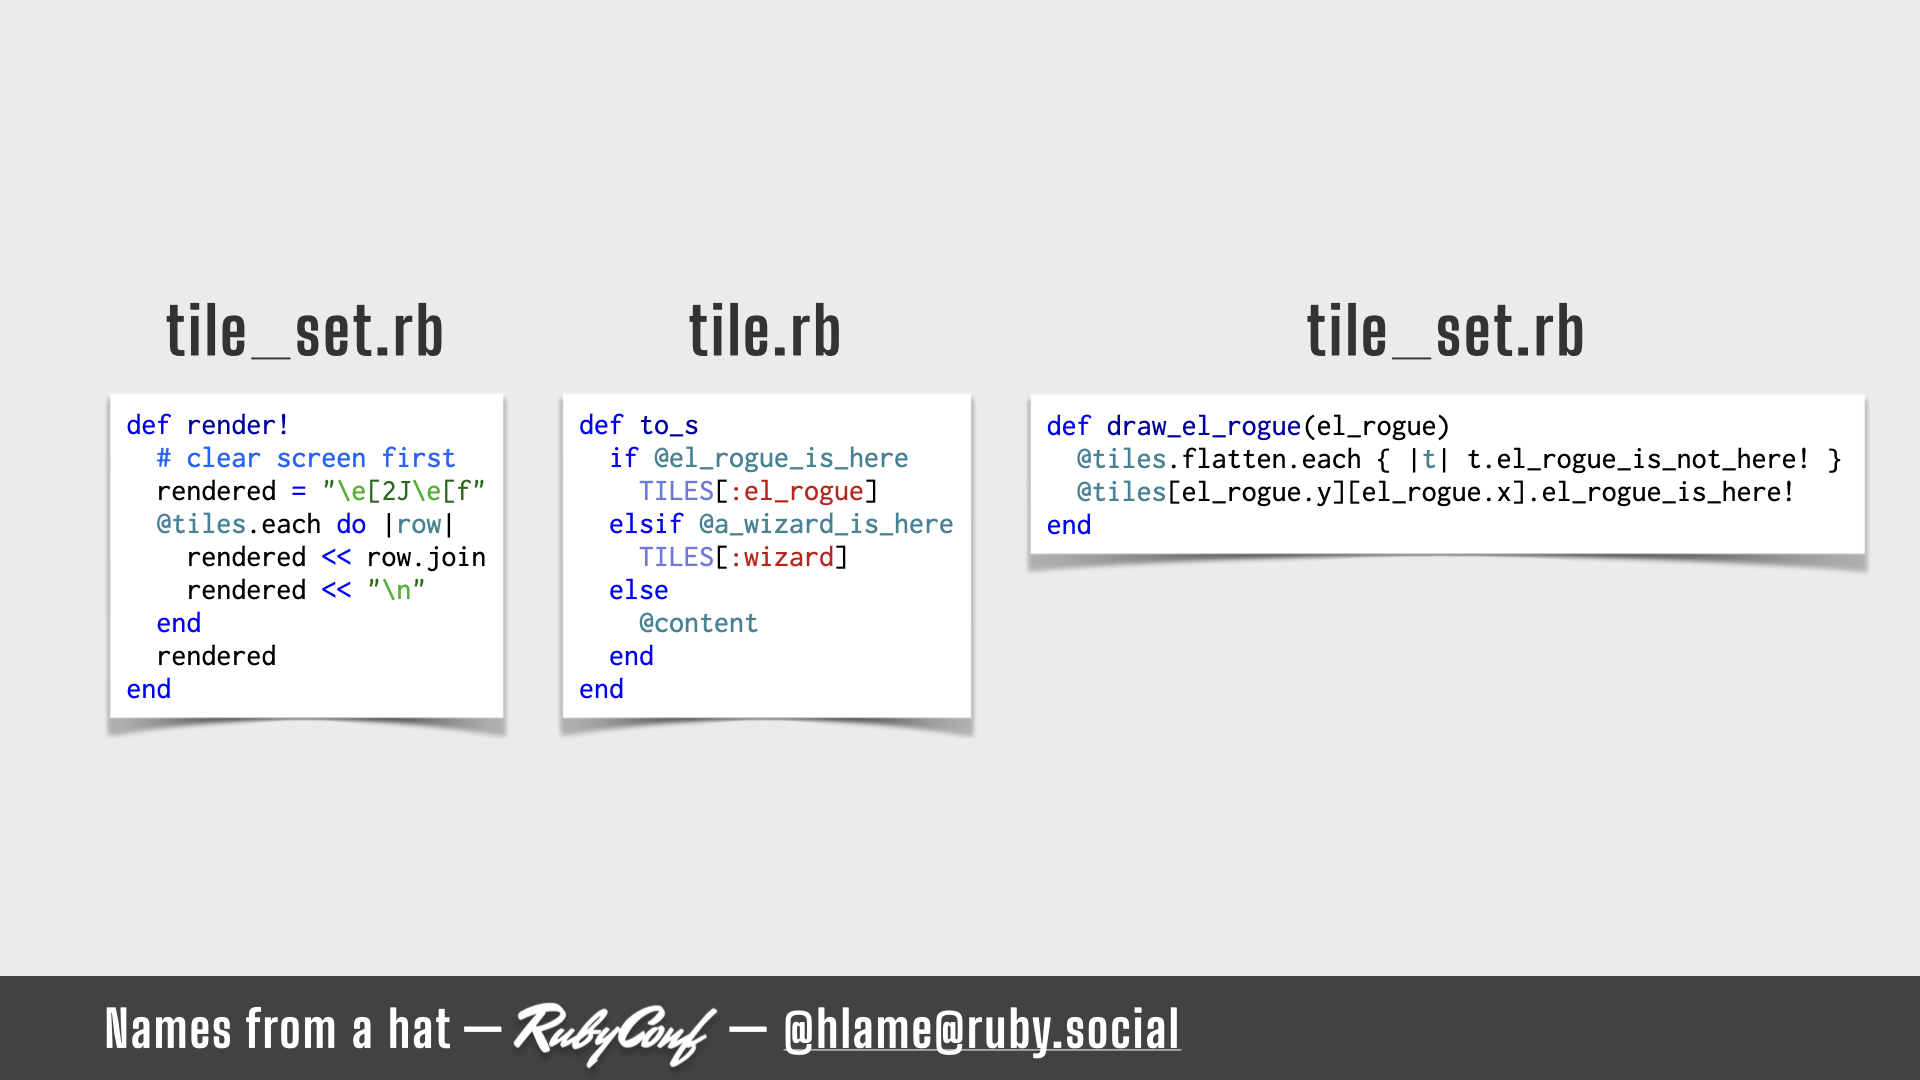
Source for code in slide: TileSet#render!, Tile#to_s, TileSet#draw_el_rogue
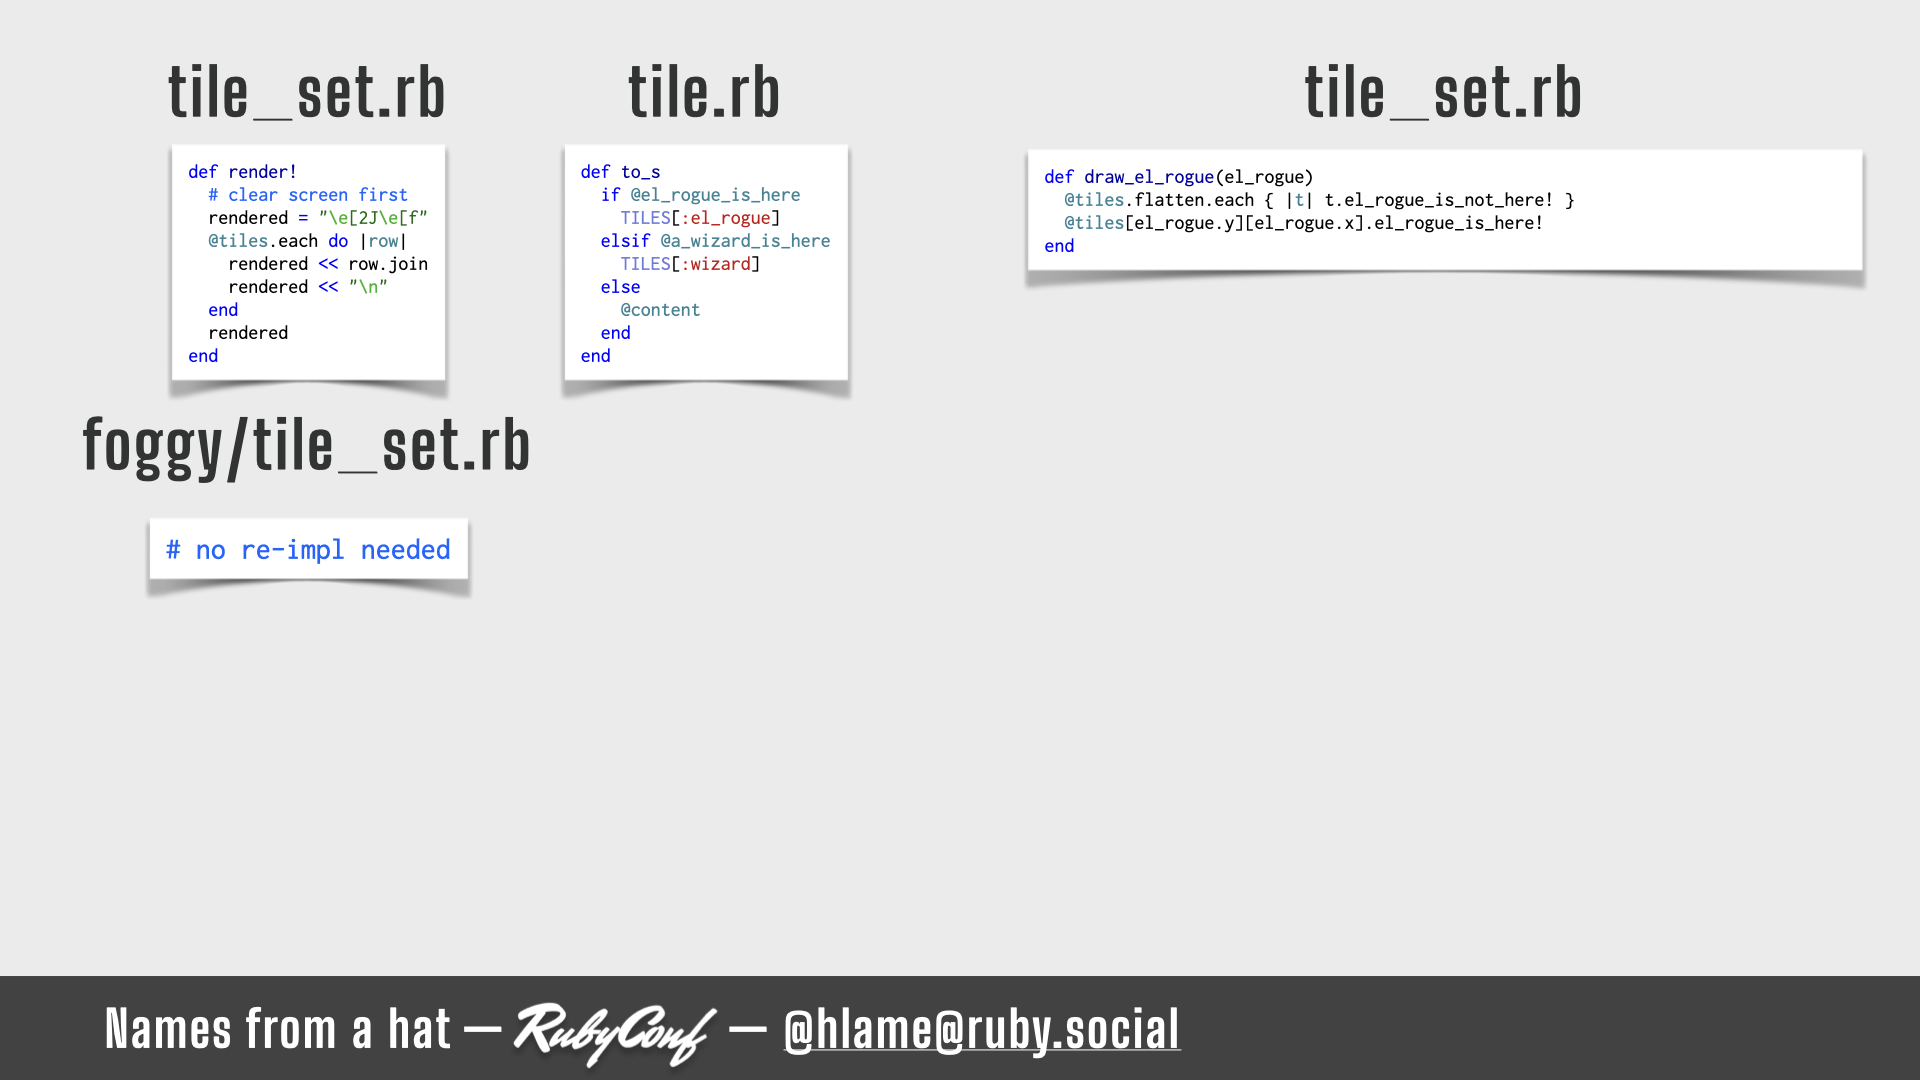
So far so simple. What I realised is that with this in place, it was fairly trivial to add the circular reveal-the-map-as-you-walk effect with a different TileSet and Tile implementation.
Revealing the world - part 1 - foggy tile sets
Source for code in slide: TileSet#render!, Tile#to_s, TileSet#draw_el_rogue
In my “foggy” TileSet render! doesn’t change, we still want to just ask each tile to to_s itself.
Revealing the world - part 2 - foggy tiles
Source for code in slide: TileSet#render!, Tile#to_s, TileSet#draw_el_rogue, Foggy::Tile#to_s
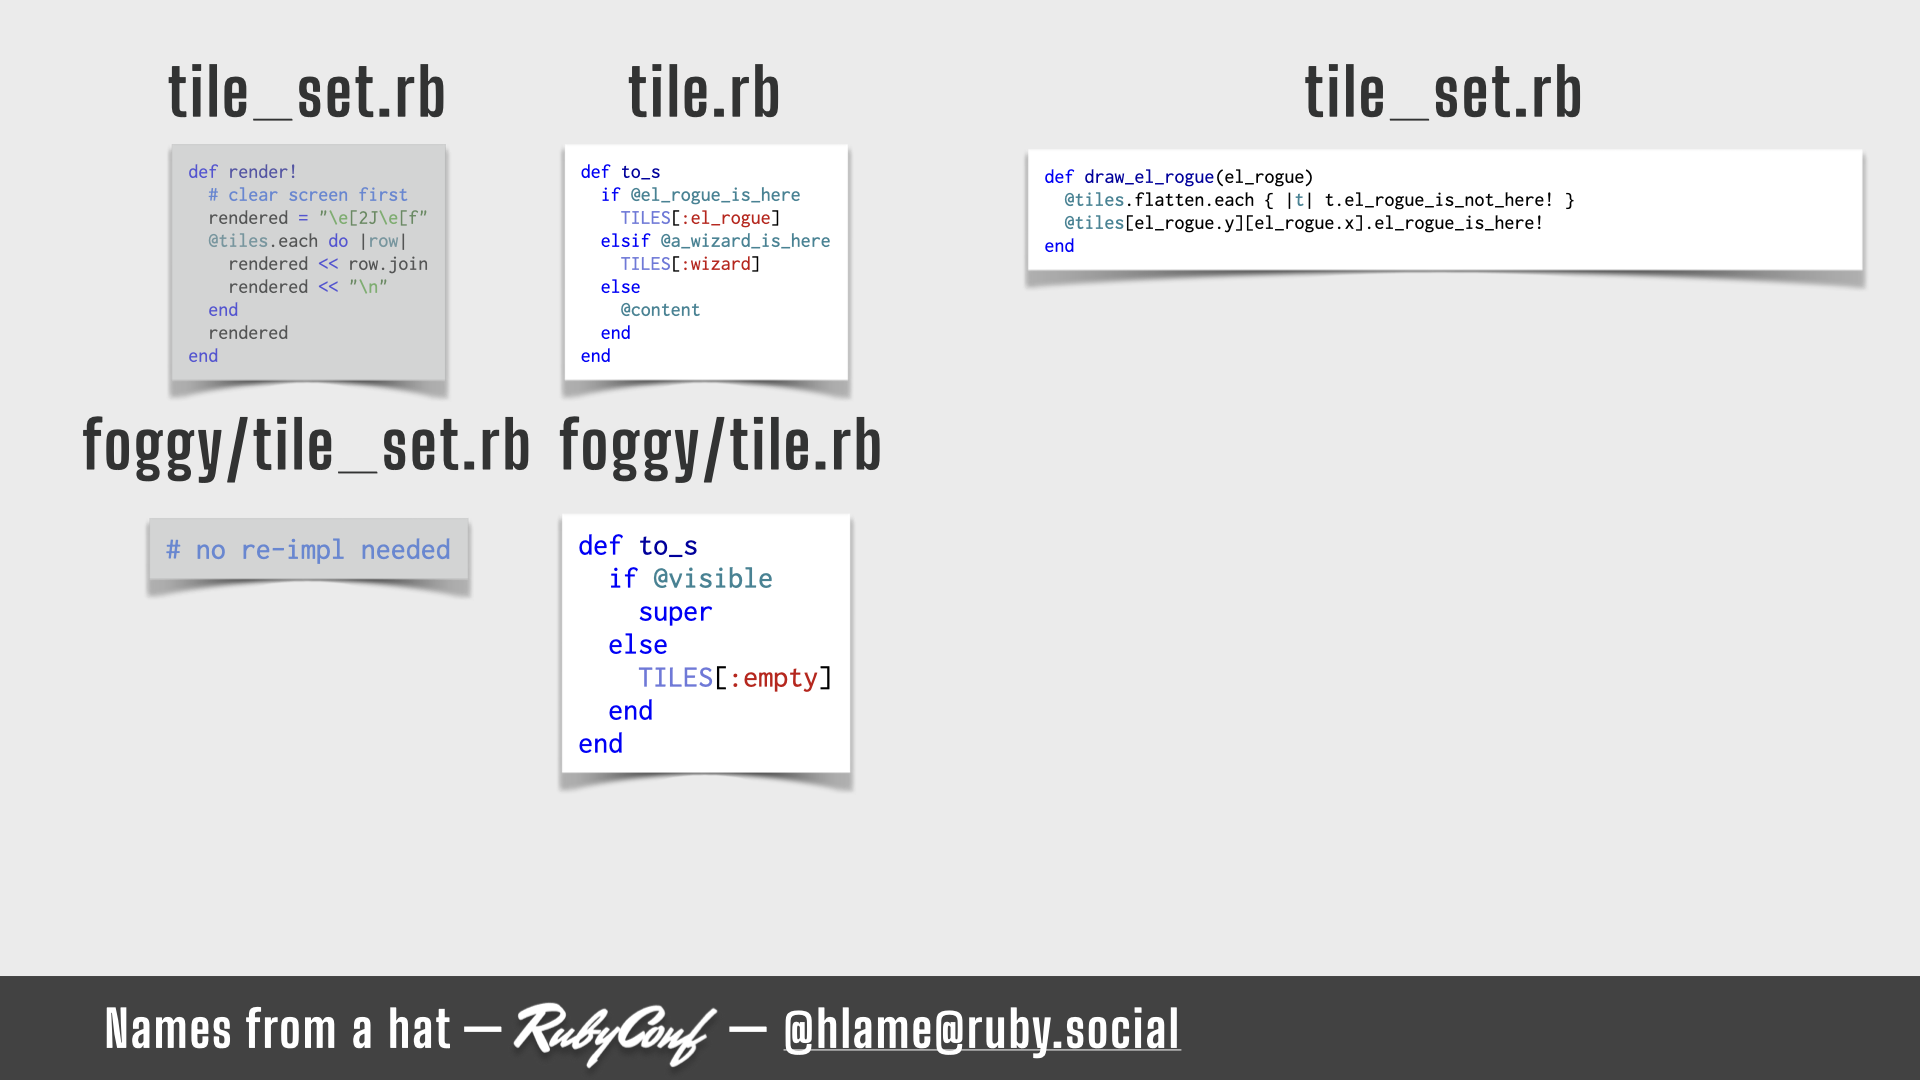
In my foggy Tile to_s relies on the Tile knowing if it’s visible or not. If it is, call super for the original implementation, but if it isn’t visible we render the empty tile character.
Revealing the world - part 3 - drawing El Rogue in a foggy world

Source for code in slide: TileSet#render!, Tile#to_s, TileSet#draw_el_rogue, Foggy::Tile#to_s, Foggy::TileSet#draw_el_rogue
How do we know if it’s visible? Well, we change the draw_el_rogue method on the Foggy::TileSet to act as before and tell the Tile that represents El Rogue’s x and y co-ordinates that El Rouge is here, but also tell the Tiles surrounding El Rogue that they are visible.
Revealing the world - part 4 - El Rogue’s surroundings

Source for code in slide: TileSet#render!, Tile#to_s, TileSet#draw_el_rogue, Foggy::Tile#to_s, Foggy::TileSet#draw_el_rogue, Foggy::TileSet#with_surroundings
Finding the surrounding tiles is iterating over every tile and USING SOME PYTHAGORAS on their co-ordinates to find those that are within the radius of the circle created by the strength of El Rogue’s eyes.
Again, not very efficient to do every tile every time, but again, ruby is fast enough.
Generating the dungeon - part 1 - visualisation
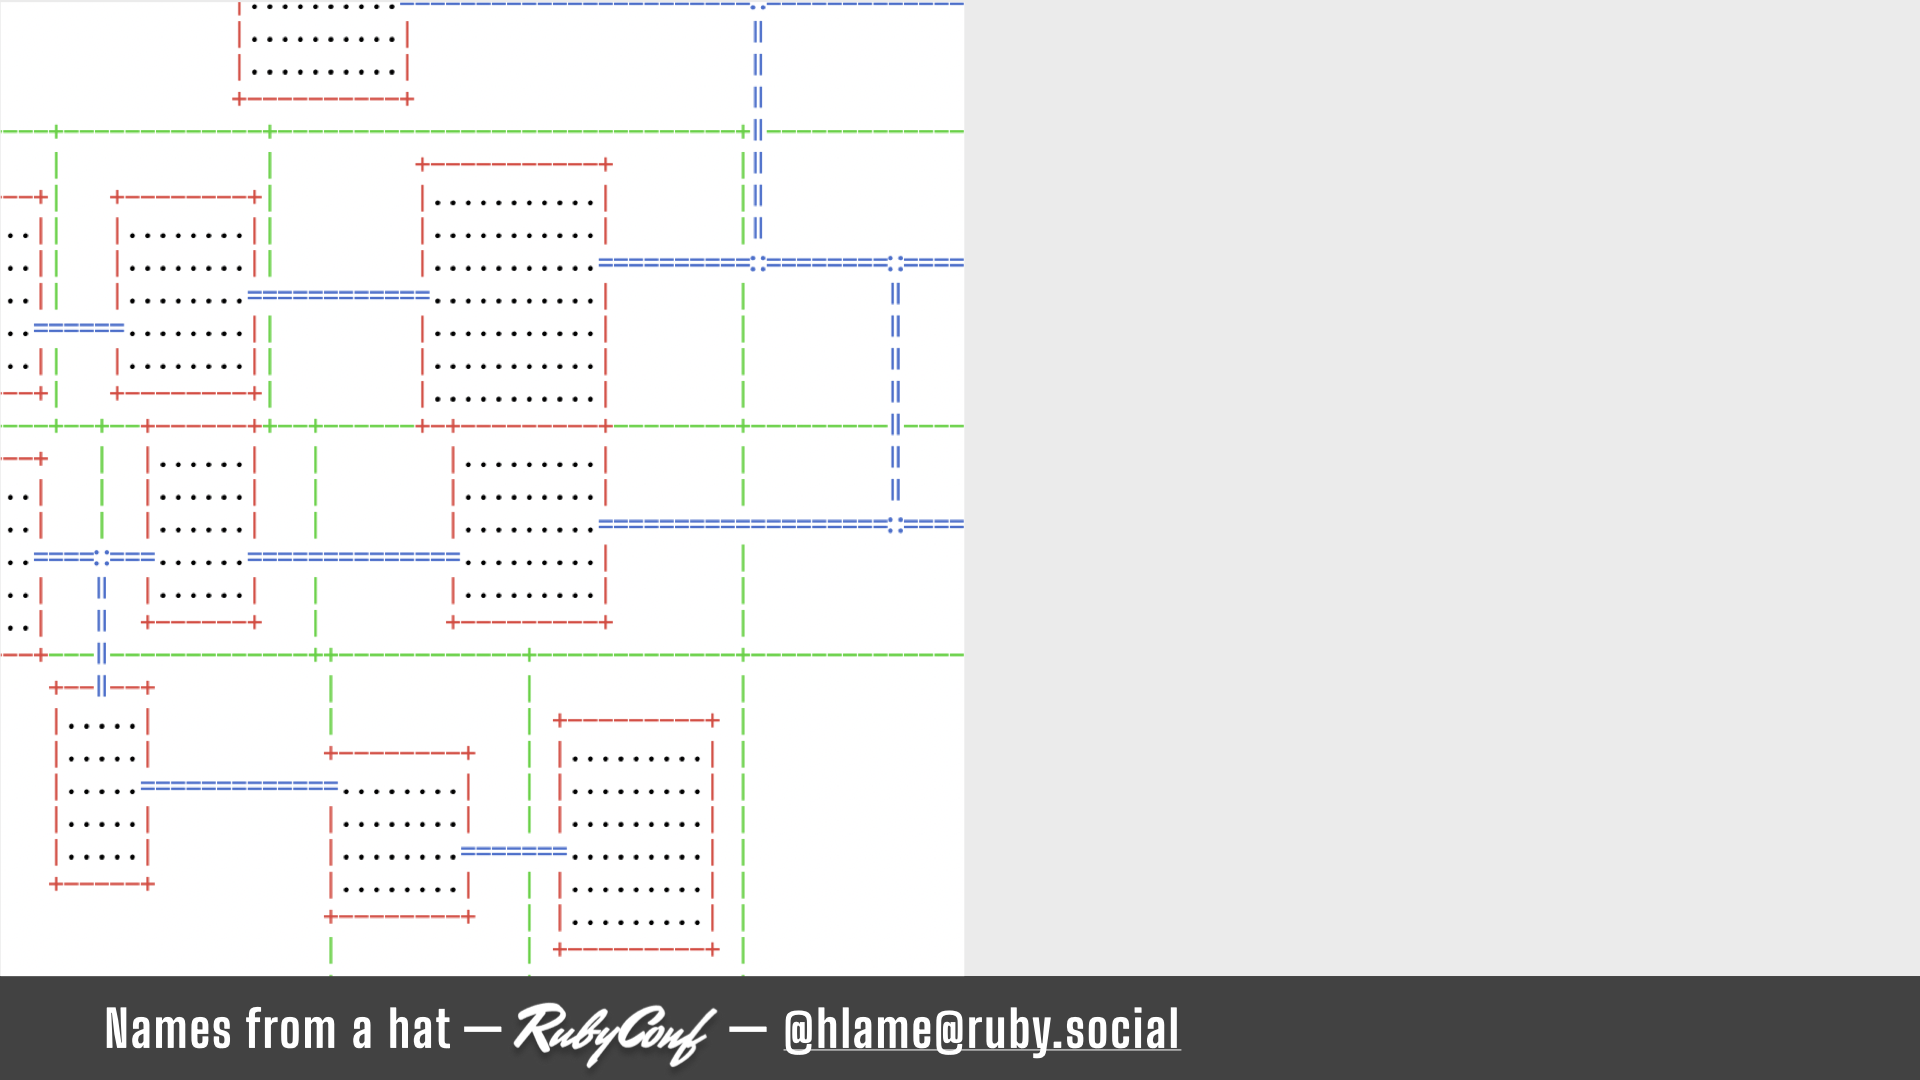
The next thing I want to talk about is how we generate the dungeons. The code is fairly complex and spread across multiple files, but luckily I could easily tweak the engine to render the world and each step in the dungeon generation process to illustrate it (because of how excellent my design was for the rendering via TileSets).
So we take our world - here delimited in green - the full screen size of our terminal window minus a row for instructions.
Then we randomly split it (random choice of horizontal vs vertical and random choice of position, favouring the middle over the edges). This gives us two child worlds inside the original world. We then keep doing this with each nested world we’ve created until we have at least our desired number of leaf worlds. There’s also a random chance that if we ask a world to split, it won’t.
Then we ask each world to place a room somewhere in the space, randomising position and width and height.
Then we link the rooms by drawing corridors to connect them walking up from the leaf nodes to their siblings and then their parents.
And that’s one way to randomly generate a dungeon
Generating the dungeon - part 2 - my invention?
Did I know how to do this? Absolutely not.
Did I invent this. Again, absolutely not.
Generating the dungeon - part 3 - keywords to use later
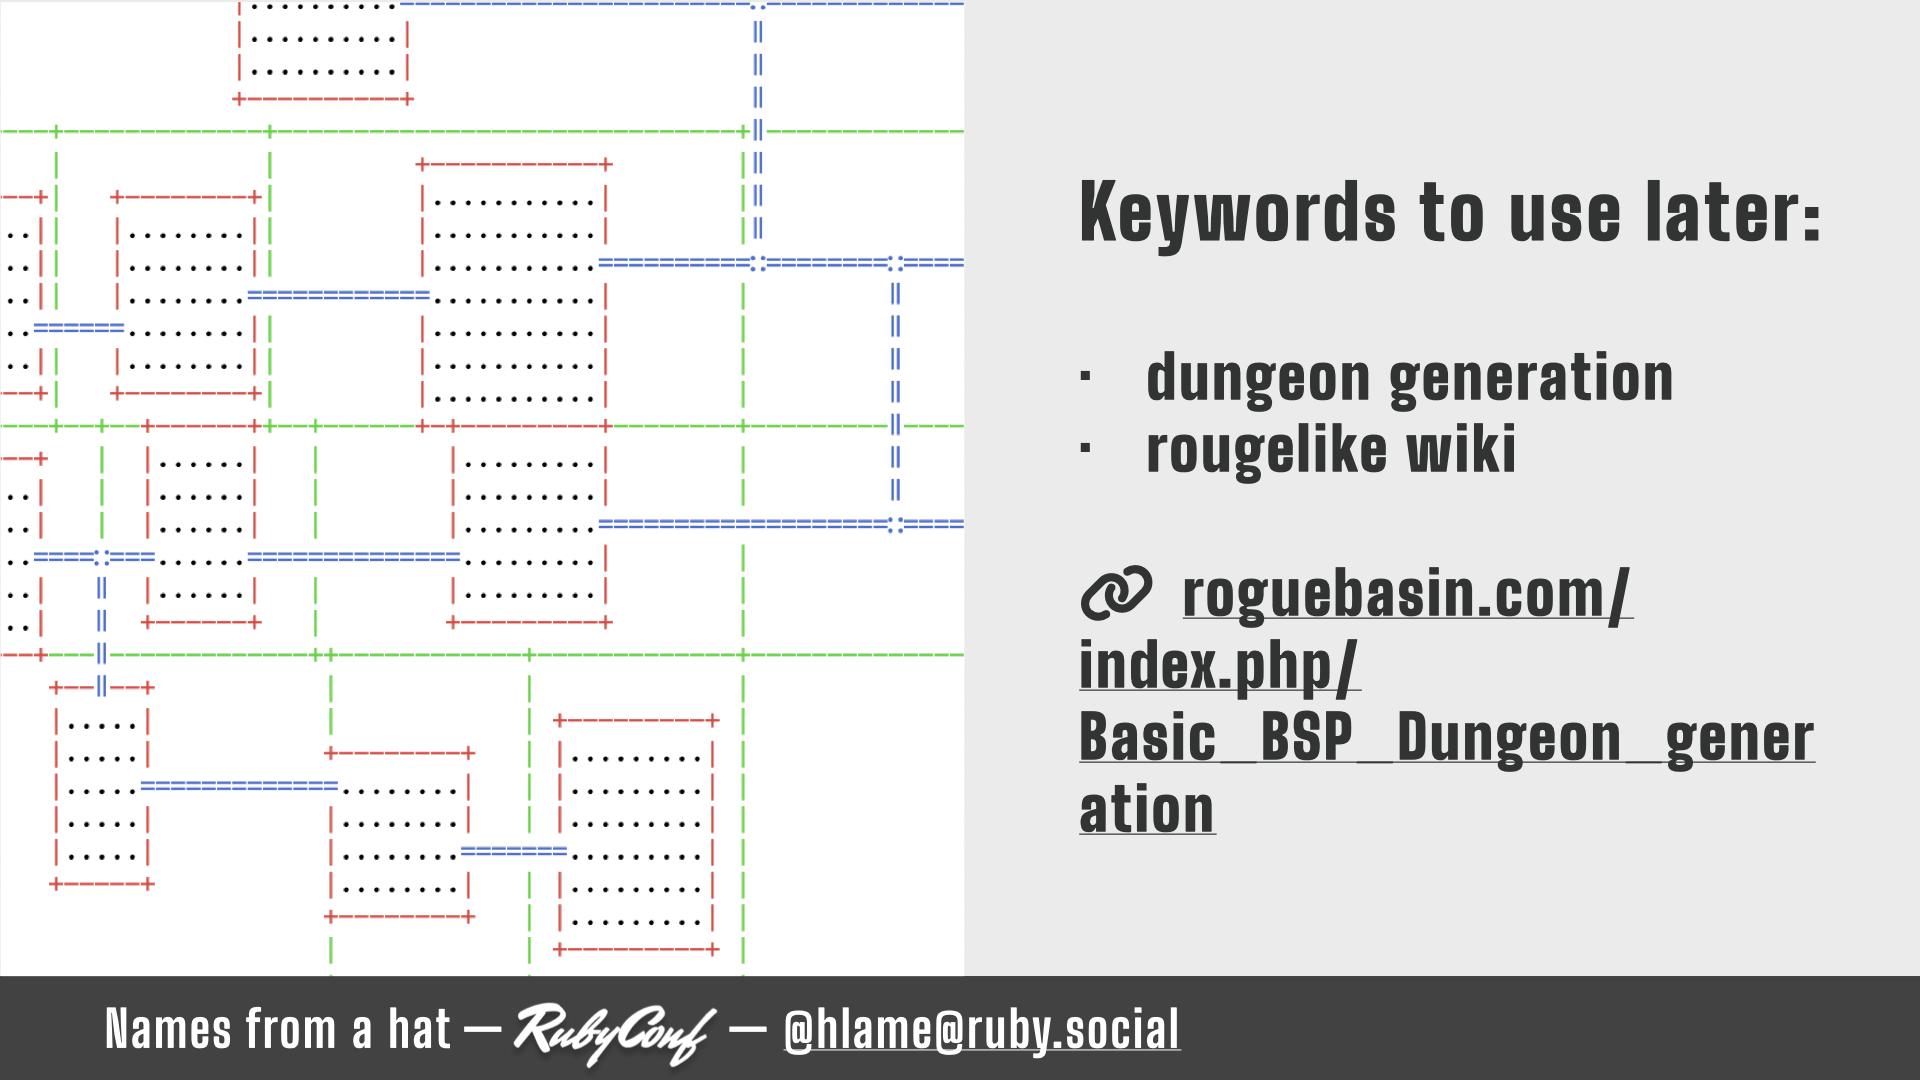
There are great resources out there for learning these techniques. There’s a whole wiki dedicated to rouge building. I just picked the first technique that I could get my head around, e.g. the one with pictures to help me understand it.
And when I first built it and got it working I spent ages running the algorithm and tweaking the params to see how they changed the dungeons it generated. I could spend forever just watching it do this.
But there are so many more techniques for creating dungeons, and even different types of dungeons. I’ve chosen a rooms + corridors dungeon using a random subdivision generation model. You could use a uniform grid, or a random walk + place algorithm. You could create more cave like dungeons that you hollow out of the terminal window using cellular automata, or maze generation algorithms. Or you can combine different techniques.
What I learned is that just like there are 1,000,000 blog posts on how to structure your rails business logic, there are 1,000,000 articles giving you help on loads of game programming techniques. Our community isn’t unique in how much it shares.
Aside: A ruby terminal game
As another little aside, turns out, although there is plenty of non-ruby terminal roguelike content out there, I’m not the only person to fiddle about with ruby for this kind of thing. A couple of months ago Dmitry Tsepelev published this lovely blog post taking you through the steps to build your own ruby-based dungeon crawler in the terminal. It has monsters and is way more game-like. You should definitely read this if you’re thinking of doing this yourself.
Over-engineering is good actually #4 - Domain modelling & patterns
The other versions I shared were pretty much single file scripts — just enough ruby to get the idea out of my head and into an .rb file. This thing, this game? I couldn’t just do it in a script. I had to think about the problem and properly model all the pieces. The domain objects like Worlds, Rooms, Corridors, Creatures and the infrastructure objects like Tiles, TileSets, Renderers and GameEngines. I had to think about patterns of how things would interact. I got to use the visitor design pattern!
It’s a small enough problem to keep in my head, but it’s a big enough problem to not just YOLO it.
It’s a good exercise to work on something of reasonable scope and get to apply this kind of thinking so I could understand how to apply those ideas in a more professional setting. Shipping a new feature to production shouldn’t be when you decide to experiment with a radical new way of modelling your business domain.
Over-engineering is good actually - recap
So lets recap all the ways that over-engineering can be good actually
Or…
Let’s not actually11. Just go and have fun. Pick up something and really push it. Learn something new, or don’t. Make toys.
Thanks for listening, bye!
Thanks for listening, bye!12
Links
Before I published the full transcript I shared a placeholder with the links and keywords mentioned in the talk. This is what that looked like:
- General links
- “Pursuing Pointlessness” by Chris Howlett - a talk I suggest you watch on building fun things
- Fibers
- Keywords to use to find out more:
- Co-routines
- Co-operative multitasking
- “Flattening Recursion with Fibers” by Jamis Buck & Adviti Mishra - a session later in the Conf that I suggest you watch
- Keywords to use to find out more:
- Shoes
- Keywords to use to find out more about shoes:
- shoesrb
- You can’t just search “shoes” or even “shoes ruby”
- shoesrb.com
- Keywords to use to find out more about art in shoes:
- nodebox
- processing
- shoesrb art
- The shoes manual on art
- Keywords to use to find out more about shoes:
- Rougelikes
- Keywords to use to find out more about building roguelikes:
- dungeon generation
- rougelike wiki
- Description of the dungeon generation technique I used
- Blogpost about building your own roguelike in ruby by Dmitry Tsepelev
- Keywords to use to find out more about building roguelikes:
- Source Code
